Creating access logs for Laravel Vapor
With the launch of Vapor, using Laravel in a serverless environment has become a lot easier. At Zonneplan, we migrated two of our Laravel projects to Laravel Vapor days after it was launched: our internal narrowcasting system and our recruitment website.
We have been amazed by how easy Vapor has made it for us to migrate from a traditional hosting environment to a serverless solution backed by AWS Lambda.
One of the things we quickly discovered that were missing compared to our traditional environment was the abiltity to view the server access logs.
Luckily, generating access logs for Vapor is not very hard. In this post I will describe the steps. It should take about 5-10 minutes to walk through them.
Create a CloudWatch group
Your access logs will be piped to CloudWatch. You will need a CloudWatch group that will contain your logs, so let's create it.
- Go to CloudWatch
- In the sidebar, click "Logs"
- You will be presented with a list of your current groups. There should be some groups there already, since Vapor generates two
CloudWatch groups for each environment. In my case, the two groups that are already there are called
/aws/lambda/vapor-wbz-productionand/aws/vapor-wbz-production-cli. - Create a new group to contain your access logs. The name is up to you. I chose
/aws/lambda/vapor-wbz-production-access. Creating a group can be done by clicking the grey "Actions" button and selecting "Create log group". - You will need the ARN of your newly created log group. To see it, click the gear-icon on the top right and tick the "ARN" checkbox. Copy/paste it ARN. You will need it in the later steps.
Create a CloudWatch log role ARN
By default, API Gateway will not be able to write access logs to CloudWatch. You will need to create an IAM role for this purpose.
- Go the IAM Console
- In the sidebar, click "Roles"
- Click "Create role"
- Choose "AWS Service"
- Choose "API Gateway"
- This role will have the predefined policy
AmazonAPIGatewayPushToCloudWatchLogsattached to it, which is exactly what we need. - Click "Next: Tags". If you use tags, fill them here. If you have no idea what this is, just skip to to "Review".
- In the "Review" Section, give your newly created role an easy to recognize name, like
APIGatewayPushLogsToCloudWatch.
Again, you will need the Role ARN. Click the gear icon on the top right of the roles list and select "Role ARN". Copy the ARN of the role that you just created.
Configure Amazon API Gateway access logging
Vapor uses Amazon API Gateway to proxy all your requests to AWS Lambda. By default, access logging will not be turned on, but the process is quite easy:
- Log in to your AWS Console and navigate to API Gateway. Make sure you select the same region as the region in which your Laravel Vapor project was created. Once you're there you should see API's matching your Vapor project names. Navigate to the API for which you want to create access logs.
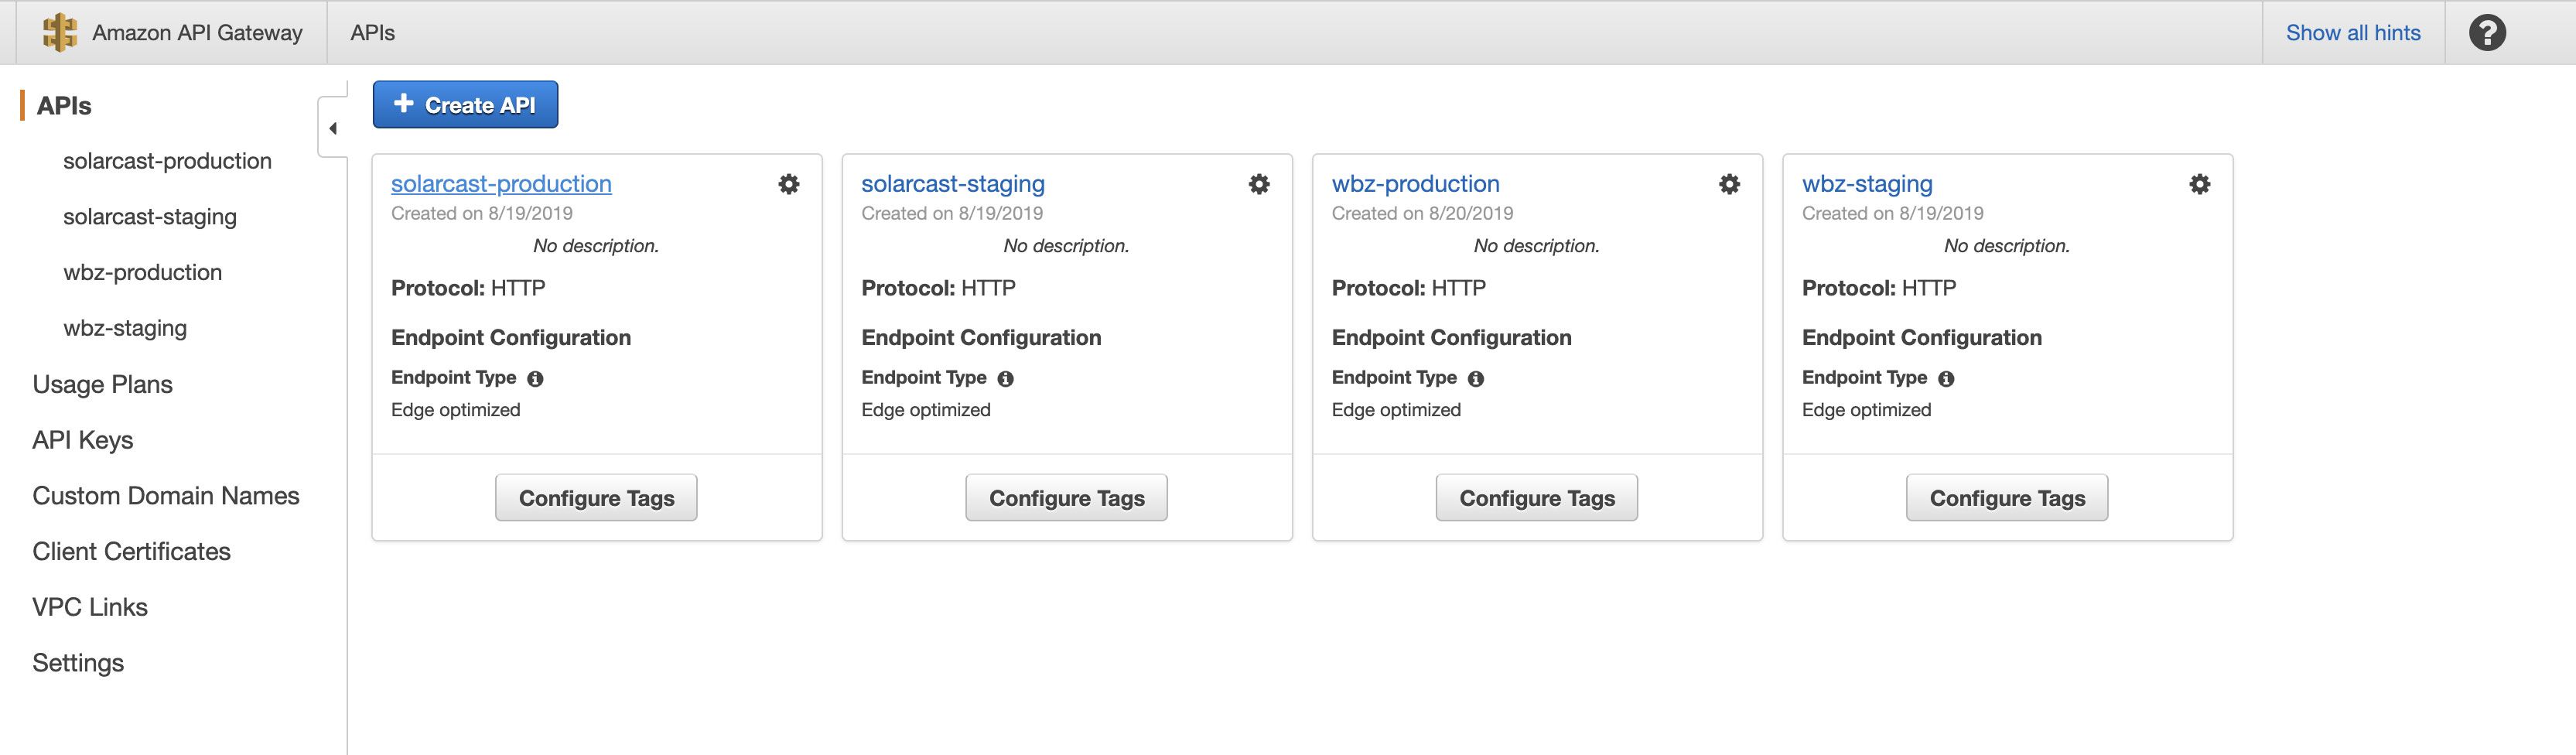
- Navigate to "Stages" and select the stage for which you want to set up access logging. Usually, your API will match the [project]-[env] format, so there should be one stage for each API listed.
- Go to the "Logs/Tracing" tab
- Tick "Enable Access Logging" and select a log format. You can customize the format according to your needs, but I won't get into that in this blog post. Here's an example of what it looks like for me:
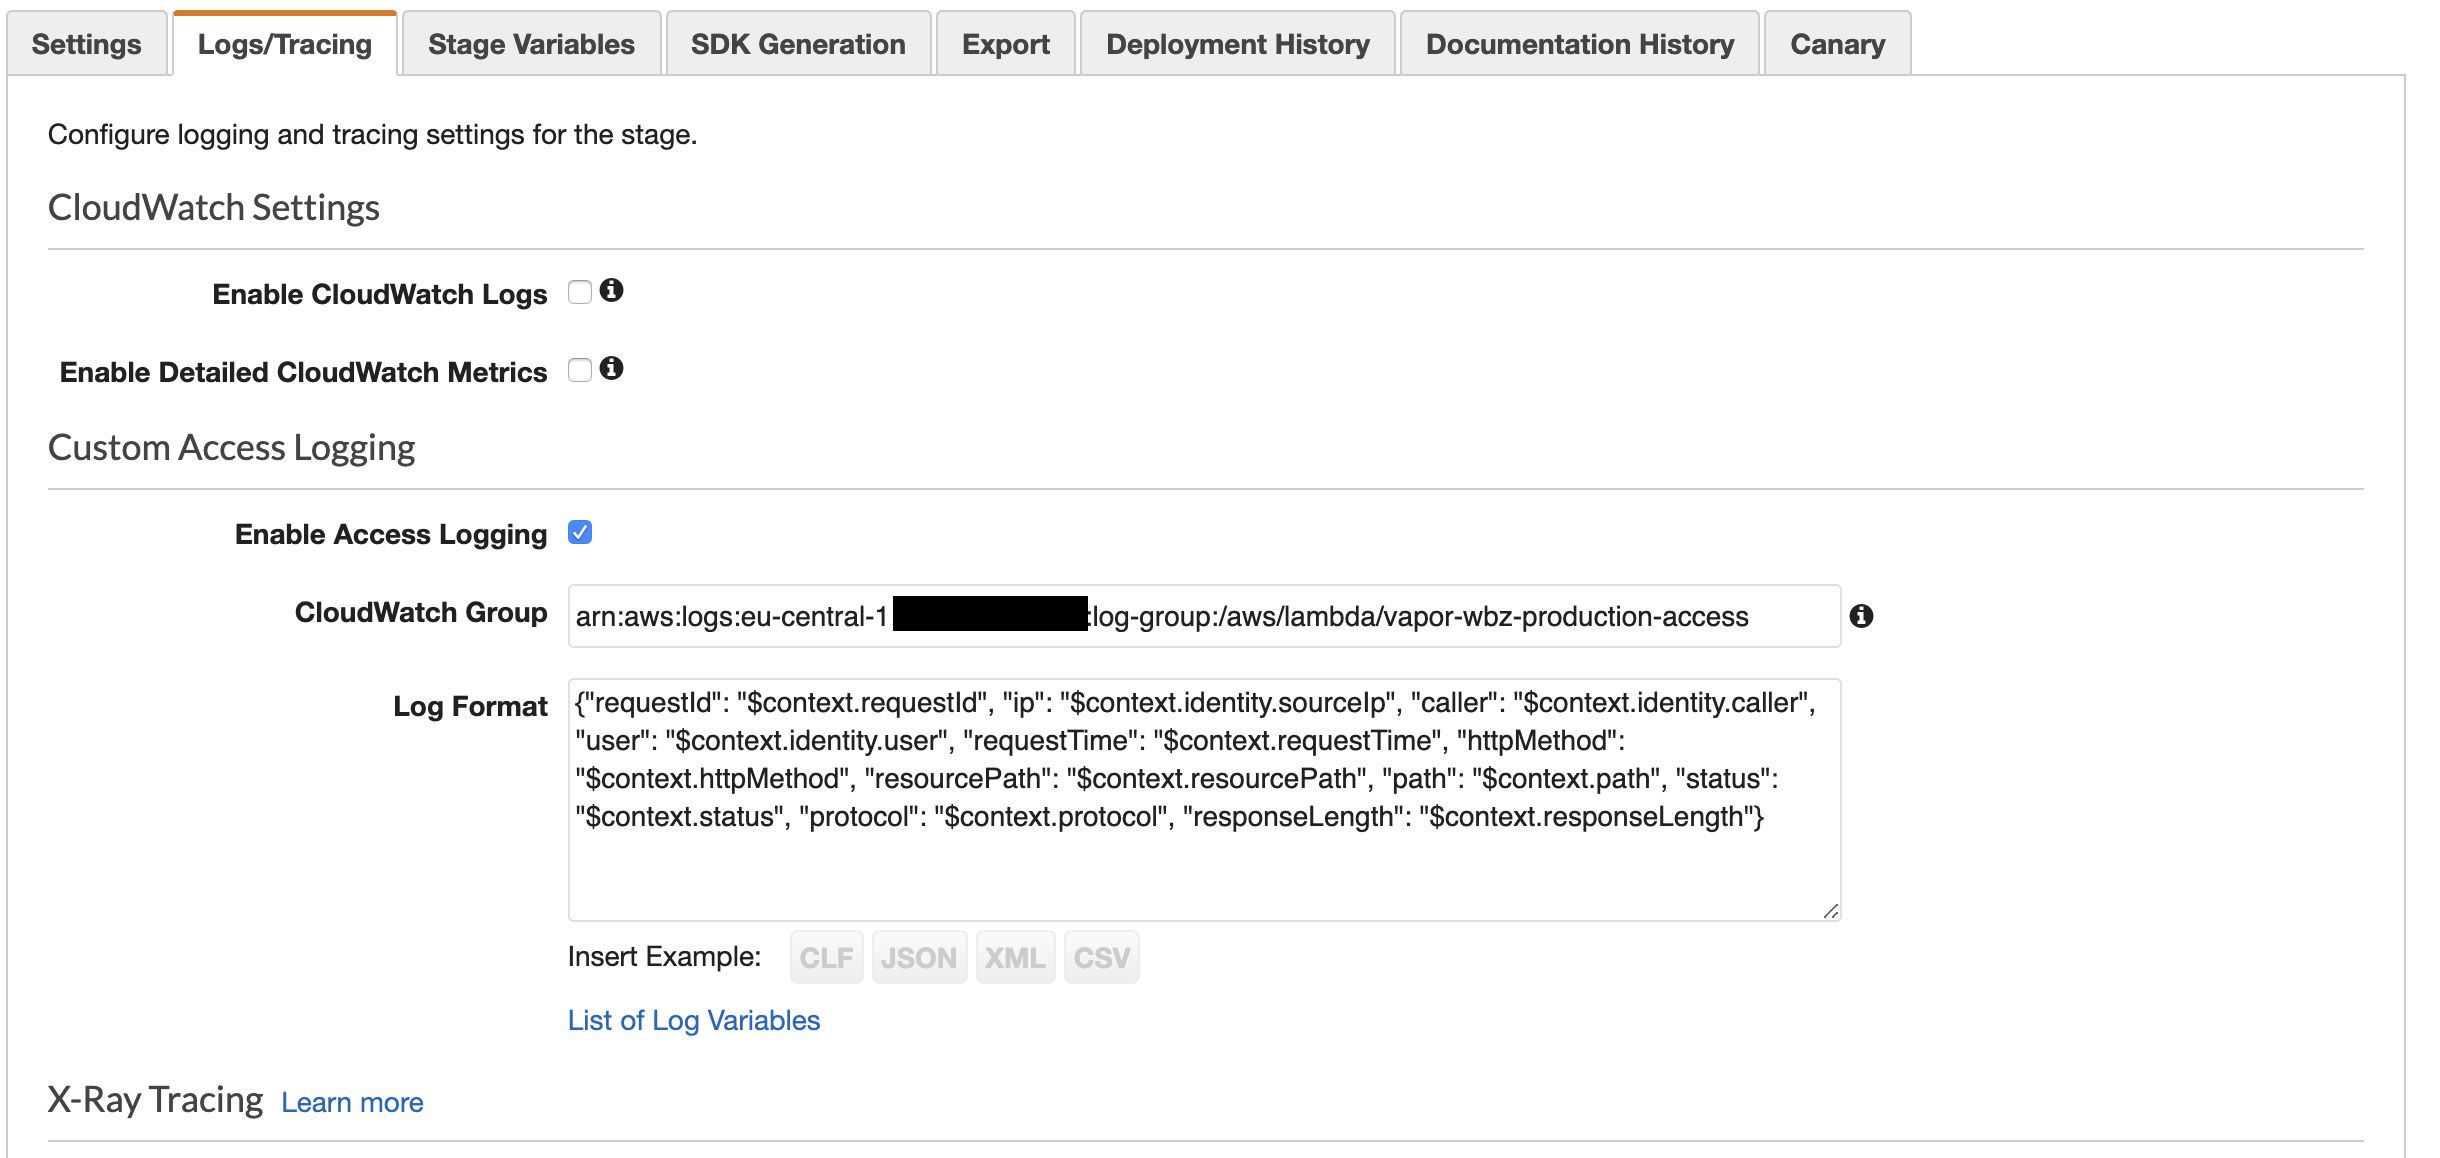
- As mentioned, Vapor uses generic proxy resources to pipe every request through a single endpoint in order to make sure that it works correctly. Because of this you will need to include the
$context.pathvariable somewhere in your log format. This is important! If you only include$context.resourcePathyour log entries will simply show/{proxy+}on each request, which is not what you want. - You will need to fill in the "CloudWatch Group" field with the ARN of the Cloudwatch Group that will be used as the destination for your access logs. This is the ARN that you copied in the earlier step.
- Last, go the the global "Setting" item in your sidebar on the left. In the next screen, fill in the ARN of the role that you created earlier and save your settings.

You're good to go!
You can now view your logs by going to Cloudwatch and selecting your newly created group. By clicking "Search Log Group" you can view the group in it's entirety.
As you can see, getting access logs to work with Laravel Vapor requires some effort, but it is not too hard. If this blog post was of any use to you, or if you have any questions, feel free to reach out to me on Twitter.